Top Rated Cleaning Company Reveals Common Areas You’re Forgetting To Clean

Table Of Contents
Do you think your house is clean? You might want to think again.
You may scrub your kitchen counters regularly, but what about the oven hood? When you vacuum your rugs, do you take a few extra minutes to clean underneath?
Despite our best efforts, there are certain areas in the home that are often overlooked or forgotten while cleaning. From the hidden crevices in the kitchen to under the bed and in the air vents, these neglected areas can harbour dust, dirt, and germs that can compromise your family’s health and well-being.
Don’t worry, though- we’ve got you covered! These tips from a top-rated cleaning company can help you tackle these forgotten areas and make your home a healthy and beautiful place to live.
Why Is It Important to Clean Your Home Regularly?
Have you ever been to someone’s house only to come home coughing and sneezing? It could be the cold that one of the kids brought home from daycare- or it could be all the dust distributed by the living room ceiling fan.
Your living environment has a huge impact on your health, happiness, and well-being. Regular cleaning can make that impact a positive one by:
Getting Rid of Dirt and Dust: Dirt and dust can accumulate quickly in your home, especially in frequently used areas. Regular cleaning helps prevent the buildup of dirt and dust, reducing the risk of allergies, respiratory problems, and other health issues.
Eliminating Germs and Bacteria: Germs and bacteria can thrive in dirty and messy environments. Regular cleaning helps eliminate these harmful microorganisms, reducing the risk of infections and illnesses.
Improving Indoor Air Quality: A clean and well-ventilated home is important for your respiratory health. Regular cleaning helps remove pollutants, dust, and allergens, improving the overall air quality of your home.
Keeping Your House Beautiful: A clean and tidy home is more inviting and comfortable for you, your family, and your guests. Regular cleaning helps maintain the appearance of your home, ensuring that it looks its best at all times.
Keeping Your House in Good Shape: Regular cleaning also helps preserve the condition of your home, preventing the buildup of grime and dirt that can cause damage to surfaces and materials over time.
By incorporating a regular cleaning routine into your daily or weekly schedule, you can ensure that your home remains a safe and comfortable place to live. Just make sure your checklist (which was prepared by the best cleaning company in Hamilton!) includes all those hidden spaces we’re about to cover.
Places In The Kitchen That Are Commonly Forgotten
The kitchen is often considered the heart of the home, a place where meals are prepared and memories are made. However, with so much activity and food preparation taking place in this area, it’s also a place where dirt, grime, and germs can accumulate quickly.
While most of us try to clean our kitchens regularly, certain areas are commonly overlooked or forgotten during cleaning. From the top of cabinets to under the refrigerator, these neglected areas can harbour dust and even bacteria, so the sooner they’re gone, the better! Here are some insights from a top rated cleaning company on the places you don’t want to miss.
Behind and Under the Refrigerator
Many people forget to clean behind and under the refrigerator. This happens for several reasons:
The space behind and under the refrigerator can be difficult to access, especially if it is a built-in unit or if there are cabinets or other obstacles in the way.
These areas aren’t in plain sight, making them easy to overlook.
People may not realize that dust, dirt, and debris build up behind and under the refrigerator without regular cleaning.
However, neglecting to clean behind and under the refrigerator can lead to a number of issues. Over time, dust and debris can accumulate in these areas, making it harder for the refrigerator to operate efficiently. This can result in higher energy bills and a shorter lifespan for the appliance. Additionally, mould and bacteria can grow in the damp and dark environment behind and under the refrigerator, which can pose health risks and cause unpleasant odours in the kitchen.
Here are the steps to clean behind and under the refrigerator:
Unplug the refrigerator and, if possible, move it away from the wall so that you can access the area behind and underneath it.
Sweep or vacuum the floor behind and under the refrigerator to remove any dust, dirt, or debris that has accumulated over time.
Use a coil brush or vacuum attachment to clean the coils on the back of the refrigerator. This will help to improve the efficiency of the appliance and prolong its lifespan.
Locate the drip pan underneath the refrigerator and remove any debris or standing water that has accumulated inside. If the pan is dirty, you can clean it with warm soapy water and a soft cloth.
If your refrigerator has a water dispenser or ice maker, check the water line for any leaks or damage.
Finally, wipe down the exterior of the refrigerator with a damp cloth and mild soap to remove any dirt or fingerprints.
Doing this at least once or twice a year can help ensure that your refrigerator runs smoothly and your kitchen remains clean and healthy.
The Inside of the Oven
Ask any top rated cleaning company, and they’ll tell you that a LOT of people forget to clean inside their ovens. According to a National Cleaning Survey by the American Cleaning Institute, nearly 47% of respondents admitted that they couldn’t remember the last time they did so!
This usually happens because it’s comparatively invisible: unless you’re using the oven, you don’t notice any mess. Other reasons include:
Cleaning the inside of the oven can be a time-consuming task, especially if it has not been cleaned in a while. It can be easier to procrastinate or avoid doing it altogether.
Some people may not be aware that the inside of the oven needs to be cleaned regularly. They may assume that it is self-cleaning or that food spills will burn off during the cooking process.
In some cases, people may be hesitant to use chemical cleaners inside the oven because they are concerned about health risks.
It is important to clean the inside of the oven for several reasons:
Food residue and grease can build up over time, which can cause unpleasant smells and smoke when you cook. This can also affect the taste of your food and make it less appetizing. It can also create a fire hazard!
Over time, the buildup of food residue and grease can affect the performance of your oven. This can cause it to take longer to preheat and cook, or it may not heat evenly, resulting in undercooked or burnt food.
If you don’t clean your oven regularly, the buildup of food residue and grease can cause damage to the interior surfaces and affect the functioning of the heating elements.
Cleaning the inside of the oven can be time-consuming, but it’s important to do it regularly to keep your appliance in good condition and prevent any safety hazards. Here are some tips straight from a top rated cleaning company:
Before you start cleaning, check the manufacturer’s instructions for any specific cleaning recommendations or restrictions.
Take out the oven racks and soak them in hot, soapy water to loosen any food residue or grease. While they’re soaking, use a plastic spatula or scraper to remove any large debris, such as burned food or grease, from the inside of the oven.
Apply a cleaning solution. You can use a commercial oven cleaner or make your own by mixing baking soda and water into a paste. Apply the solution to the interior surfaces of the oven, avoiding the heating elements.
Allow the cleaning solution to sit for the recommended amount of time, as specified on the product label or recipe. Then use a damp cloth or sponge to wipe away the cleaning solution and any loosened debris. Rinse the interior surfaces with clean water to remove any remaining cleaning solution, then dry thoroughly with a clean cloth.
Scrub the oven racks with a scrub brush or sponge, then rinse and dry them thoroughly before placing them back in the oven.
Don’t forget to clean the oven door as well, using a glass cleaner or a mixture of vinegar and water.
After cleaning, turn on the oven to a low temperature for a few minutes to help dry out any remaining moisture.
On a similar note, cleaning the inside of a microwave oven is important for the same reasons. Start by unplugging it from the power source, then remove any loose debris or food particles from the bottom and walls of the microwave.
Once you’ve cleared everything away, put a solution of equal parts water and vinegar in a microwave-safe bowl and heat it for 5-10 minutes until the solution boils and steams up the inside of the microwave. After letting the bowl cool for a few minutes, carefully remove it and use a damp cloth or sponge to wipe down the inside of the microwave.
For stubborn stains, use a mild cleaning solution or baking soda paste to gently scrub the area. Rinse the cloth or sponge and wipe down the inside of the microwave again to remove any residue. Finally, leave the microwave door open to air dry and eliminate any remaining odours.
The Top of the Cabinets
The top of kitchen cabinets is not at eye level and is often out of sight, so it’s easy to forget that it needs cleaning. However, neglecting to clean the top of kitchen cabinets can lead to several issues. For example:
Dust and dirt can accumulate, leading to an unhygienic kitchen environment.
The accumulated dust can also attract insects and pests.
Over time, the dirt can become embedded, making it even harder to clean. In some cases, it can even impact the air quality in the kitchen.
Cleaning the top of kitchen cabinets can be a challenging task due to its height and difficulty in reaching it. However, with the right tools and techniques (courtesy of a top rated cleaning company!), it can be done.
Before you start cleaning, remove any items on top of your kitchen cabinets, including decorative pieces, plants, or storage containers. Then do the following:
Use a soft-bristled brush or microfibre cloth to dust off any loose dirt, cobwebs, or debris from the surface. You can also use a vacuum with an extended hose attachment to remove any dirt or debris.
Mix a solution of warm water and a mild cleaning detergent, such as dish soap, in a bucket. Dip a microfibre cloth or sponge into the solution and wring out any excess water. You can also use a commercial all-purpose cleaner.
Stand on a sturdy step stool or ladder and use the cloth or sponge to wipe down the surface of the cabinets, starting from the back and working your way towards the front. Use circular motions and apply gentle pressure to remove any dirt or grime. Avoid using abrasive cleaners or tools that can scratch the surface of the cabinets.
Once you have cleaned the surface, rinse the cloth or sponge with clean water and wipe down the surface again to remove any residual cleaning solution. Use a dry cloth or paper towel to dry the surface thoroughly. Once the surface is dry, you can replace the items you removed earlier.
If you live in an area with high humidity or dust, you should clean the top of your kitchen cabinets at least once or twice a month, to prevent any accumulations that can cause problems later.
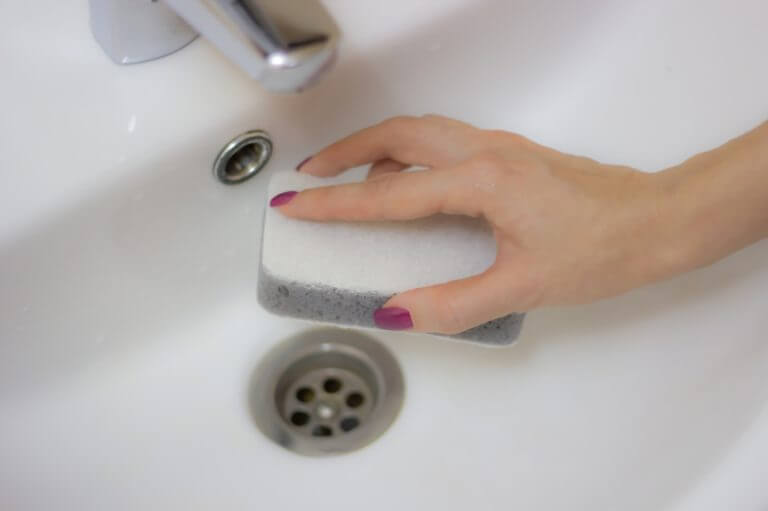
Underneath the Sink
It’s easy to forget that dark space under the kitchen sink. Not only is it hidden from view, but it’s usually cluttered with cleaning supplies, sponges, and other items jumbled together. This can make it hard to see any dirt or dust.
However, neglecting to clean under the kitchen sink can lead to several issues. The area can become a breeding ground for mould and bacteria, especially if there is a leak. The accumulation of dirt and debris can also attract pests like cockroaches and rodents, which can be a health hazard.
Here are the steps you can follow to clean under your kitchen sink:
Start by removing all the items from under the sink. This includes cleaning products, sponges, trash bags, and anything else stored there. Take the time to declutter the area by throwing away any old or expired cleaning products. You can also organize the remaining items by placing them in a bin or container.
Wipe down the surfaces under the sink, including the walls, floor, and inside of the cabinet doors, using a damp cloth. You can use a mild detergent or all-purpose cleaner to remove any dirt or grime.
Inspect the area for any signs of leaks or water damage. If you find any issues, make the necessary repairs or contact a professional plumber to fix the problem.
Once everything is dry, place the items back under the sink in an organized manner. According to a top rated cleaning company, you can use bins or containers to group similar items together and make it easier to find what you need.
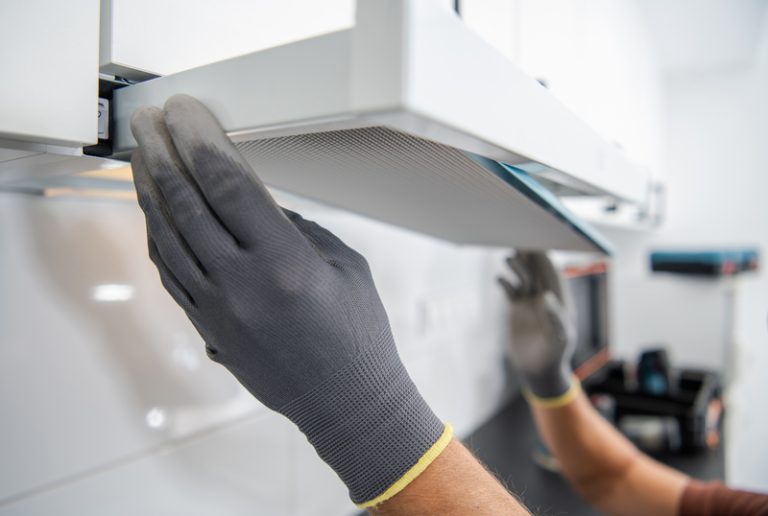
Oven Hood
Oven hoods, also known as range hoods or exhaust hoods, are often overlooked because they are located high up and out of sight, making any buildup less noticeable. However, oven hoods are designed to collect grease and smoke from cooking, which means they can quickly become dirty and clogged. Over time they can even pose a fire hazard.
To clean your oven hood, turn it off and make sure it’s cool to the touch. Then take the following steps:
Remove the filter(s) from the hood and soak them in hot, soapy water for about 10-15 minutes to loosen any dirt and grease.
Scrub the filter(s) with a soft-bristled brush and rinse thoroughly with water. You may need to use a degreaser or baking soda paste for tougher grease stains.
Once the filter(s) are clean, dry them thoroughly before reattaching them to the hood.
Finally, wipe down the outside of the hood with a damp cloth and a mild cleaning solution to remove any remaining dirt or grime.
Dishwasher Filter
Dishwasher filters are responsible for catching food particles, debris, and grease during the washing cycle. Over time, if the filter is not cleaned, it can become clogged, leading to a decrease in the dishwasher’s performance and even causing damage to the machine.
Cleaning dishwasher filters is a relatively simple process that can be done in a few easy steps.
First, consult your dishwasher’s manual to locate the filter and determine the best method for removing it. In most cases, the filter can be removed by twisting it counterclockwise or pulling it up and out of the dishwasher.
Once the filter is removed, discard any debris or food particles that have accumulated in the filter’s mesh screen. Rinse the filter under hot water to remove any remaining debris. For particularly stubborn buildup, you can soak the filter in hot, soapy water for a few minutes before rinsing it off.
Finally, reinstall the filter back into the dishwasher and make sure it is secure in place. It’s recommended to clean the dishwasher filter at least once a month to keep your dishwasher running smoothly and your dishes sparkling clean.
Dryer Lint Trap
Since it’s tucked out of sight, dryer lint traps are easily overlooked, but emptying yours should be part of your laundry routine. By cleaning your lint screen regularly, you can extend the life of your dryer, dry your clothes more effectively, and help keep your energy bills as low as possible. Neglecting this step not only puts more stress on your dryer but also creates a potential fire hazard.
Each time you remove your clothes from the dryer, check the lint trap. Simply pull out the lint screen, peel away the lint, and throw it away. Every three months, give the screen a deep clean by removing any small particles with your vacuum’s hose attachment and gently scrubbing it with dish soap and warm water. While it’s drying on paper towels, use a slender vacuum attachment to clean the trap slot.
It’s also important to pay attention to your dryer’s exhaust vents. Get them professionally cleaned at least every two years, although you might want to bump the schedule to every year if you do a lot of laundry.
Trash Cans
Since trash cans are designed to hold garbage, we might assume that any spills or residue inside are just a normal part of their function. However, it’s important to clean trash cans regularly to prevent the buildup of bacteria and unpleasant odours. Not only will it help keep your home smelling fresh, but it can also reduce the risk of attracting pests like flies and rodents.
Cleaning a trash can is a simple process that can be done with a few basic supplies:
After removing any bags or debris that might be inside, use a hose or a bucket of water to rinse out the inside. Be sure to get into all the corners and crevices.
Mix together a cleaning solution using a few drops of dish soap and a gallon of warm water. You can also add a small amount of vinegar to help neutralize odours.
Use a scrub brush or sponge to scrub the inside of the can with the cleaning solution. Pay special attention to any areas that are particularly dirty or have caked-on debris.
Once the trash can is clean, rinse it out thoroughly with clean water to remove any soap residue. Then, allow it to dry completely before adding a new trash bag.
Places In The Bathroom That Are Commonly Forgotten
The bathroom requires frequent cleaning to maintain hygiene and prevent the spread of germs. While most of us focus on the obvious surfaces like the sink, toilet, and shower, there are many areas in the bathroom that often go unnoticed and are neglected during cleaning.
The Showerhead
Neglecting to clean the shower head can lead to bacteria and mineral deposits buildup, which can reduce water pressure and cause unpleasant odours. In extreme cases, the buildup can even lead to the growth of harmful bacteria, such as Legionella, which can cause respiratory infections. Therefore, it’s important to make cleaning the shower head a regular part of your bathroom cleaning routine.
Here are some steps you can follow to clean your shower head effectively:
After turning off the water supply to the showerhead, remove it from the wall or hose (depending on the type of showerhead).
If the shower head has removable parts, disassemble it and soak the parts in a mixture of equal parts white vinegar and water for at least an hour. If it cannot be disassembled, fill a plastic bag with the vinegar and water solution, and secure the bag around the shower head with a rubber band or twist tie.
Allow the shower head to soak in the solution for at least an hour or overnight, depending on the level of buildup.
After soaking, remove the shower head from the solution and scrub it with a soft-bristled brush to remove any remaining mineral deposits or buildup.
Rinse the shower head thoroughly with water and reattach it to the wall or hose. Turn on the water supply and allow the water to run for a few minutes to flush out any remaining debris.
Behind the Toilet
Many of us focus on cleaning the more visible areas of the toilet, such as the bowl and seat, and overlook the space behind it. As any top rated cleaning company will tell you, however, the area behind the toilet can accumulate dust, hair, and other debris, as well as moisture from bathroom use, which can lead to the growth of mould and bacteria.
Here are some steps you can follow to clean behind the toilet effectively:
Use a vacuum with a hose attachment to suck up any dust, hair, or debris from behind the toilet. Be sure to get into all the nooks and crannies, including the base of the toilet and the area around the water supply valve.
Apply a cleaning solution to a brush or rag and scrub the area behind the toilet thoroughly. Use a solution that is appropriate for your bathroom surface (e.g., tile, grout, or painted wall), and be sure to follow the manufacturer’s instructions.
Once you’ve scrubbed the area behind the toilet, rinse it with clean water to remove any remaining cleaning solution or debris.
Use a clean towel or rag to dry the area behind the toilet completely. This will help prevent the growth of mould and bacteria.
Inside the Medicine Cabinet
It’s easy to assume that the inside of your medicine cabinet is relatively clean, especially if you only store medications or other personal care items inside. However, this is not always the case, as dust and other debris can accumulate over time, leading to potential health hazards. Fortunately, keeping it clean is pretty easy
Start by removing all items from the cabinet, including medications, toiletries, and other personal care items. Place them on a clean, flat surface nearby. Then take the following steps:
Use a microfibre cloth or a soft-bristled brush to dust the shelves and walls of the cabinet thoroughly. Be sure to get into all the corners and crevices to remove any dust or debris that may have accumulated.
Mix a cleaning solution of warm water and mild soap or a multi-purpose cleaner. Dip a clean cloth or sponge into the solution and wipe down the shelves and walls of the cabinet, paying special attention to any sticky or dirty areas.
Use a dry cloth or paper towel to dry the shelves and walls of the cabinet completely. This will help prevent the growth of mould and mildew.
Once the cabinet is clean and dry, organize the items you removed earlier and place them back in the cabinet. Discard any expired or unused medications or other products. It’s a good idea to make cleaning the inside of the medicine cabinet a regular part of your bathroom cleaning routine to maintain a clean and organized space.
Grout
Cleaning the grout in the bathroom can be a tedious and time-consuming task, which may be why it is often overlooked during regular cleaning routines. However, neglecting to clean the grout can lead to harmful bacteria, mould, and mildew growth. These tips from a top rated cleaning company can help you remove any buildup and keep the grout clean moving forward:
Apply the cleaning solution, which can be a store-bought grout cleaner or homemade solution consisting of equal parts of water and vinegar or water and baking soda. Spray it directly onto the grout and let it sit for 5-10 minutes. This will allow the solution to penetrate and loosen the dirt and grime.
Use a stiff-bristled brush or a grout brush to scrub the grout vigorously. Pay special attention to any heavily stained or discoloured areas. You may need to apply a bit of elbow grease to remove stubborn stains.
Once you have scrubbed the grout thoroughly, rinse it with water to remove any remaining cleaning solution. You can use a damp cloth or sponge to remove the solution and dirt.
Use a dry cloth or towel to dry the grout completely. This will prevent moisture from getting trapped in the grout and help prevent the growth of mould and mildew.
If you want to prevent future staining and make cleaning easier, you can apply a grout sealer to the grout lines. This will help repel water and dirt and make it easier to clean the grout in the future.
Places In The Living Room That Are Commonly Forgotten
Dust, dirt, and allergens can easily accumulate in the living room since we spend a lot of time there. Regular cleaning, especially in areas we tend to overlook, can help reduce these contaminants, thereby improving indoor air quality and lowering the risk of respiratory problems. It can also help improve the appearance of the room and create a more welcoming atmosphere for your guests.
Behind and Under the Furniture
Cleaning behind and under furniture may not be considered a priority, as these spaces aren’t immediately visible to us or to our guests. However, dirt and allergens can accumulate in these hard-to-reach areas and cause issues. To get at them, follow these steps from the best cleaning company in Hamilton!
Start by moving the furniture away from the wall or corner to access the area behind and underneath it. If it’s too heavy to move, try sliding it gently using furniture sliders or ask for assistance. Once you have access to the space, do the following:
Use a broom or vacuum cleaner with an extension wand to sweep or vacuum up any dust, dirt, and debris from behind and under the furniture. Be sure to reach into the corners and edges where dust tends to accumulate.
Use a damp cloth or microfibre duster to wipe down the surfaces of the furniture that were previously hidden. This will remove any dust or cobwebs that may have accumulated.
Sweep or vacuum the surrounding area to remove any dirt and debris that may have been dislodged during the cleaning process.
Once the area behind and under the furniture is clean, carefully move it back into place. Be sure to use furniture pads to protect the floors and prevent any scratches or scuffs.
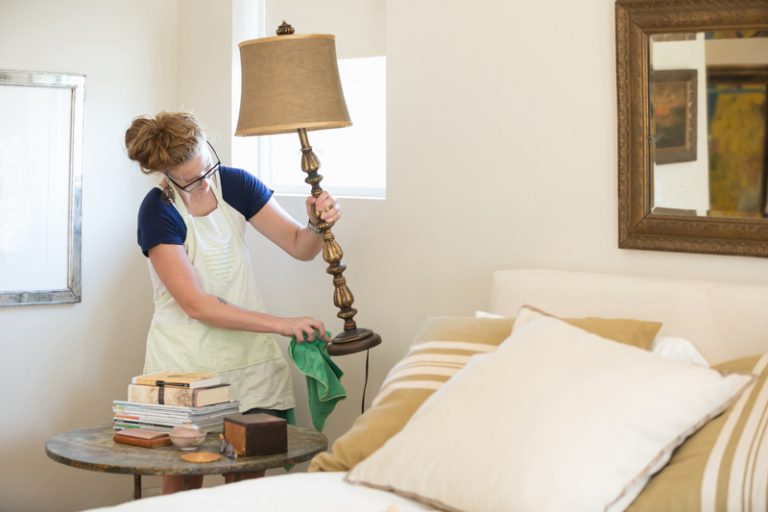
Lampshades
Lampshades are often overlooked during cleaning. Although this is usually because they aren’t as visibly dirty as other surfaces, some lampshades may have delicate materials or intricate designs that make cleaning them seem more daunting. However, regular cleaning can keep them looking their best as well as prevent the buildup of dust and allergens.
The best way to clean lampshades depends on the material of the shade. Here are some general tips from a top rated cleaning company:
Fabric Lampshades: Remove any loose dirt or dust using a soft-bristled brush or a lint roller. Then fill a basin or sink with warm water and add a small amount of gentle fabric cleaner. Dip a soft cloth or sponge into the solution and gently wipe the lampshade, starting at the top and working your way down. Be sure not to saturate the fabric, and avoid scrubbing too hard. Rinse with clean water and let the lampshade air dry completely before replacing it.
Plastic or Glass Lampshades: Remove the lampshade and wash it in warm, soapy water using a soft sponge or cloth. Rinse with clean water and dry with a soft cloth or let it air dry before replacing it.
Paper Lampshades: Use a soft-bristled brush or a lint roller to remove any loose dirt or dust. Avoid getting the lampshade wet, as it can cause the paper to warp or become discoloured. Instead, use a clean, dry cloth to gently wipe the surface of the lampshade.
Specialty Materials: If your lampshade is made from a specialty material, such as silk or beaded fabric, it’s best to consult the care instructions or contact the manufacturer for specific cleaning recommendations.
Regardless of the material, avoid using harsh chemicals, abrasive sponges, or scrub brushes as they can damage the lampshade. Additionally, make sure the lamp is unplugged, and the bulb has cooled before cleaning the shade to prevent any accidents or injuries.
Places Throughout the Bedroom That Are Commonly Forgotten
Even the most diligent cleaners can sometimes overlook certain areas in the bedroom. From hidden nooks to hard-to-reach spots, there are a number of places that can be easily forgotten during the cleaning process. You can enjoy a cleaner, healthier, and more organized bedroom by paying attention to these often-overlooked areas.
Pillows and Mattresses
Pillows and mattresses can accumulate dirt, sweat, oil, and bacteria over time. This can lead to unpleasant odours, allergies, and even health issues. Regularly cleaning pillows and mattresses can help extend their lifespan, improve the quality of your sleep, and promote a healthier living environment.
Here are some general tips for cleaning pillows and mattresses.
Cleaning Pillows
Before cleaning your pillows, check the care label for specific instructions from the manufacturer. Some pillows may not be machine washable or may require special care.
Machine Washable Pillows: If your pillows are machine washable, place them in the washing machine with mild detergent on a gentle cycle. You can add a second rinse cycle to ensure all soap is removed. Tumble dry on low heat with dryer balls or clean tennis balls to help fluff them up.
Non-Machine Washable Pillows: If your pillows are not machine washable, spot-clean them using a damp cloth and mild detergent. Allow the pillow to air dry completely before Some pillows may require dry cleaning, which can be done by a professional cleaner.
Cleaning Mattresses
Using a vacuum with a hose attachment, thoroughly vacuum the mattress to remove any dust, dirt, or debris. Pay extra attention to the seams and edges of the mattress.
Use a clean cloth or sponge to blot the affected area with a solution of mild detergent and water for stains or spills. Be sure to avoid soaking the mattress, as this can lead to mould or mildew growth.
To remove odours from the mattress, sprinkle baking soda over the surface and let it sit for at least 30 minutes. Vacuum up the baking soda with a clean vacuum. You should clean pillows every six months and vacuum and deodourize mattresses every few months to keep them clean and fresh.
The Headboard
Since the headboard is usually behind piles of pillows and bedding, it can be easy to forget that it needs cleaning. However, a dirty headboard can detract from the overall cleanliness of the bedroom and even contribute to poor indoor air quality should dust accumulate.
How you should go about cleaning your bed headboard depends on its material and design. Here are some general steps from a top rated cleaning company you can follow:
Use a soft-bristled brush or dry microfibre cloth to remove any loose dust or debris from the headboard. Start at the top and work your way down.
Use a vacuum with a soft brush attachment to remove any remaining dust or debris from the headboard. This can also be a good way to get into hard-to-reach areas.
Use a damp cloth or sponge to wipe down the headboard. You can use a mild cleaning solution if necessary, such as a mixture of warm water and dish soap. Be sure to wring out the cloth or sponge well before wiping, to avoid getting the headboard too wet. After wiping, use a dry microfibre cloth to dry the headboard. This will help to prevent any water damage or warping.
If your headboard is made of wood, you can apply a wood polish or wax to give it a little extra shine. Be sure to follow the manufacturer’s instructions for application and buff off any excess with a clean cloth. For fabric headboards, check the care label for cleaning instructions. Some fabric headboards may require professional cleaning or spot cleaning only.
Under the Bed
It’s easy to overlook the area under the bed since we don’t see it on a daily basis, but out of sight should not mean out of mind. Dust, dirt, and other debris can accumulate under the bed, contributing to poor indoor air quality and potential health issues. Regular cleaning can help keep this area tidy and free of dust and allergens.
If your bed has wheels or can be easily moved, carefully slide it away from the wall to give you access to the space underneath. If your bed is not easy to move, you can clean under it using a long-handled tool, such as a broom or vacuum cleaner with an extension hose.
Here’s an overview of the steps you can take for a thorough cleaning:
Using a broom or vacuum cleaner, remove any loose dust, dirt, or debris from the floor under the bed. Be sure to get into all the corners and crevices. You can also use a dustpan to collect the debris as you go.
After removing any loose debris, use a vacuum cleaner or broom to sweep or vacuum the floor under the bed. Be sure to get into all the nooks and crannies. Use an extension hose attachment on your vacuum cleaner to reach difficult areas.
While you have the bed moved, take the opportunity to clean the base of the bed. Dust and wipe down any surfaces with a damp cloth, and remove any accumulated debris.
Once you have finished cleaning, carefully move the bed back into place.
By following these steps recommended by a top rated cleaning company, you can easily clean under your bed and help maintain a clean and healthy living environment. It’s a good idea to clean under the bed every few months or as needed, especially if you or anyone in your household suffers from allergies or respiratory issues.
Closet Shelves and Drawers
If your closet is cluttered and disorganized, it can be difficult to even see the shelves and drawers, let alone remember to clean them. However, keeping them clean is important to prevent the buildup of dust, dirt, and other allergens that can affect our health. Regular cleaning can also help keep your clothes and other items free of odours and stains.
To clean closet shelves and drawers, follow these steps:
Remove all items from the shelves and drawers and place them on your bed or another flat surface. Take this opportunity to also declutter your items and get rid of anything you no longer need or use. This will make it easier to clean the shelves and drawers and keep them organized.
Use a vacuum or a damp cloth to remove any dust, dirt, or debris. If there are any stains or spills, use a mild cleaning solution and a clean cloth to wipe them away.
Make sure everything is completely dry before returning your items. You can use a dry cloth or leave them to air dry for a few minutes.
Once the shelves and drawers are clean and dry, you can start organizing your items and putting them back in place. Consider using storage solutions like bins, baskets, or dividers to help keep everything tidy and easy to find.
Places Throughout the House That Are Commonly Forgotten
Some fixtures are found in more than one room. Below is an overview of each one and how you can keep it clean moving forward.
Ceiling Fans
Over time, dust and dirt can accumulate on a fan’s blades and motor, which can impact indoor air quality and even cause it to run less efficiently. Although cleaning a ceiling fan can be a bit tricky, it’s not difficult if you follow these steps from a top rated cleaning company:
First, turn off the ceiling fan and wait for it to stop spinning completely before attempting to clean it.
Gather cleaning supplies. You will need a ladder, a soft-bristled brush, a microfibre cloth or duster, and a cleaning solution. You can use a store-bought cleaner or make your own by mixing warm water and mild dish soap.
Use the soft-bristled brush or a microfibre cloth to gently dust the blades. Starting at the top of the blade, work your way down, making sure to get all sides. You can also use a vacuum with an attachment to suck up any loose dust.
Once you have removed the dust, use a microfibre cloth or duster to wipe down the blades with the cleaning solution. Be sure to get into all the nooks and crannies.
Use a damp cloth to wipe down the motor housing, being careful not to get any water into the motor or electrical components.
Use a dry cloth to wipe down the blades and motor housing, making sure everything is completely dry.
Depending on how often you use your ceiling fan and how dusty your home is, you may need to clean it more frequently. Aim to clean your ceiling fan at least once every three months.
Curtains and Blinds
Unlike other items such as floors and counters, curtains and blinds don’t always show obvious signs of dirt and grime. That doesn’t mean it isn’t there: curtains and blinds are like any other surface in that they can accumulate dust, pet hair, and other allergens over time.
How you clean your curtains and blinds will vary depending on the type of material and how dirty they are. Here are some general tips from the best cleaning company in Hamilton to get you started!
Use a handheld vacuum or the brush attachment on your regular vacuum to remove dust and dirt from the curtains and blinds.
For small stains, use a damp cloth or sponge to gently dab at the affected area. Avoid rubbing, as this can cause the stain to spread.
Check the care label on your curtains to see if they are machine washable. If they are, remove any hooks or hardware and wash them in cold water on a gentle cycle. Hang to dry. Some curtains may require dry cleaning: if yours do, take them to a professional cleaner and follow the care instructions on the label.
A handheld steamer can be used to remove wrinkles and refresh curtains. Be sure to test a small, inconspicuous area first to ensure the steam does not damage the fabric.
You can use a microfibre cloth or a special blind duster to remove dust from your blinds. Alternatively, you can remove them from the window and wash them in the bathtub with warm water and mild soap. Rinse and let dry before rehanging.
Remember to always check the care label and test a small area first before cleaning the entire curtain or blind.
Baseboards
Baseboards are often overlooked during cleaning because they blend so easily into the background. Some are also a dark colour, making it hard to detect any build-up of dirt or grime. The good news is that cleaning baseboards can be a relatively easy task with the right tools and techniques.
Use a dry microfibre cloth or a soft-bristled brush to remove any loose dust or cobwebs. Start at the top and work your way down.
Take a vacuum with a soft brush attachment and remove any remaining dust or debris from the baseboards. This can also be a good way to get into hard-to-reach areas.
Wipe down the baseboards with a damp cloth or sponge. You can use a mild cleaning solution if necessary, such as a mixture of warm water and dish soap. Be sure to wring out the cloth or sponge well before wiping, to avoid getting the baseboards too wet.
After wiping, use a dry microfibre cloth to dry the baseboards. This will help to prevent any water damage or warping.
If you want to give your baseboards a little extra shine, you can use a furniture polish or wax. Apply a small amount to a cloth and rub gently over the baseboards. Be sure to buff any excess off with a clean cloth.
Window Sills and Tracks
Over time, window sills and tracks can accumulate a lot of dirt, especially if you have screen windows that allow dust to be blown inside. Regular cleaning can help prevent buildup, improve indoor air quality, and help maintain the functionality of your windows.
Cleaning window sills and tracks is an important task that can be easily done by following these steps from a top rated cleaning company:
Use a small brush, such as a toothbrush or paintbrush, to remove any loose debris, such as dust, dirt, or dead insects, from the window sills and tracks. Be sure to get into all the corners and crevices.
After removing the loose debris, use a vacuum cleaner or broom to sweep or vacuum the window sills and tracks. This will help to remove any remaining dust or dirt.
Dampen a cloth with warm water and use it to wipe everything down. Be sure to get into all the corners and crevices. If there are any stubborn stains or grime, you can use a mild cleaning solution, such as a mixture of warm water and dish soap.
After wiping down the window sills and tracks with a damp cloth, rinse them with clean water. This will help to remove any remaining soap or cleaning solution.
Use a dry cloth or paper towel to dry everything thoroughly. This will help prevent any moisture from causing damage or attracting more dirt.
Picture Frames
Picture frames blend into the background and are essentially part of the decor, making them easy to forget about when cleaning. Fortunately, adding them to your cleaning routine won’t add too much time to your day and the results are worth it!
Carefully remove the picture from the frame and set it aside. Then take the following steps:
Use a soft-bristled brush or a microfibre cloth to gently remove any dust or debris from the frame. Start at the top of the frame and work your way down, making sure to get into all the nooks and crannies.
Once you have removed the dust, use a microfibre cloth or a damp cloth to wipe down the frame. Be sure to use a gentle cleaning solution if needed and avoid getting the frame too wet, as this can cause damage.
Use a dry cloth to wipe down the frame and remove any excess moisture.
If the frame has glass, use a glass cleaner and a microfibre cloth to clean it. Spray the cleaner onto the cloth instead of directly onto the glass to avoid overspray and streaks.
Air Vents
Unlike surfaces that accumulate visible dust or debris, air vents may not show noticeable signs of dirt or grime until they become significantly clogged. Neglecting to clean air vents can negatively impact air quality and potentially lead to respiratory issues for those who are sensitive. Additionally, dirty air vents can reduce the efficiency of your HVAC system, leading to higher energy bills and the need for more frequent maintenance.
Cleaning air vents is an important part of regular home maintenance and can be done using the following steps from a top rated cleaning company:
Turn off the HVAC system to prevent the spread of dust and debris throughout your home while you’re working.
Using a screwdriver, remove the vent covers or grilles from the wall or ceiling. Be sure to keep screws in a safe place.
Wipe down the vent covers with a microfibre cloth or rinse them with warm, soapy water. For more stubborn stains or buildup, use a gentle cleaning solution or a specialized vent cleaning brush.
Use a vacuum cleaner with a brush attachment to gently remove dust and debris from the air ducts. Be sure to vacuum all surfaces, including the sides and back of the vent opening.
If necessary, use a damp cloth or specialized air duct cleaning brush to clean the inside of the air ducts. Be sure to avoid using harsh chemicals or abrasive cleaners that could damage the ducts.
Once the vent covers and air ducts are clean and dry, replace the covers and secure them with the screws.
Light Switches
It’s easy to assume that a light switch doesn’t need cleaning unless it is visibly dirty. What’s important to remember is that these switches are a common touch point in the home and can quickly become loaded with germs and bacteria. However, cleaning light switches is a quick and easy task that can be done in just a few simple steps:
Turn off the power to the switch at the circuit breaker to avoid the risk of electrical shock.
Using a damp cloth or sponge and a mild cleaning solution, gently wipe down the switch and the surrounding area to remove any dirt or grime. Be sure to wring out the cloth or sponge well before using it to clean the switch, and avoid getting moisture into the switch or electrical components.
After cleaning, use a dry cloth or paper towel to wipe down the switch and remove any excess moisture.
Once the switch is clean and dry, turn the power back on at the circuit breaker.
It’s a good idea to clean light switches regularly, especially in high-traffic areas or rooms where there is a lot of moisture, such as bathrooms or kitchens. By including light switches in your regular cleaning routine, you can help keep your home clean and reduce the spread of germs and bacteria.
Door Knobs
Like light switches, doorknobs are used frequently throughout the day, which can make it difficult to find a time to clean them without interrupting your daily routine. Unless the doorknob is visibly dirty or discoloured, it can be easy to assume that it does not require cleaning.
To clean door knobs, you can follow these simple steps from a top rated cleaning company:
Mix a mild cleaning solution with warm water. You can use a variety of cleaning solutions, such as all-purpose cleaners, vinegar and water, or a mild soap and water solution.
Dip a soft cloth or sponge into the cleaning solution and wring out the excess water. Gently wipe down the doorknob, including the backplate, knob, and any screws or other hardware.
Use a cotton swab or toothbrush to clean any crevices or hard-to-reach areas around the door knob.
Use a dry cloth to wipe down the doorknob and remove any excess moisture. For added protection against germs and bacteria, you may want to also disinfect the door knob using a disinfectant spray or wipe. Be sure to follow the manufacturer’s instructions for proper use.
It’s a good idea to clean door knobs regularly, especially in high-traffic areas or rooms where there is a higher risk of germs and bacteria, such as bathrooms, kitchens, and entryways.
Cabinet Handles
Cabinet handles are another common touch point, but they aren’t cleaned as often as they should be, especially if their colour or design makes it hard to detect dirt. To keep your cabinet handles clean, do the following:
Mix a mild cleaning solution with warm water. You can use a variety of cleaning solutions, such as all-purpose cleaners, vinegar and water, or a mild soap and water solution.
If possible, remove the handles from the cabinets or drawers. This will allow you to clean them more thoroughly.
Dip a soft cloth or sponge into the cleaning solution and wring out the excess water. Gently wipe down the handles, including any crevices or hard-to-reach areas. For particularly dirty or greasy handles, you may want to use a degreaser or all-purpose cleaner.
Use a dry cloth to wipe down the handles and remove any excess moisture. Once the handles are dry, reattach them to the cabinets or drawers. If you are unable to remove the handles, you can still clean them in place using the same method. Be sure to take extra care to clean any crevices or hard-to-reach areas.
Under Rugs
Since rugs cover the floor, it’s easy to forget what’s underneath them. However, it’s important to clean under rugs regularly to prevent the accumulation of dust and dirt, which can contribute to allergies and other health issues. It’s recommended to vacuum under rugs at least once a month or more frequently if you have pets or allergies.
To clean under rugs, you’ll need to move the rug out of the way first. Here are some steps you can follow:
Remove any furniture on or near the rug to make it easier to move.
Lift one corner of the rug and fold it over to expose the floor underneath.
Use a broom or vacuum cleaner to sweep or vacuum the floor underneath the rug. If there’s a lot of dirt or dust, you can use a damp mop to clean the floor.
Once the floor is clean, roll the rug back in place and adjust it until it’s in the right position.
Repeat the process for the other corners of the rug until you’ve cleaned underneath the entire rug.
Spring is Coming! Get Ready With These Tips From a Top Rated Cleaning Company!

Wow- you probably never thought your home had so many hidden dirt traps! While tackling them will add some extra time to your cleaning routine, creating a healthier living space for your family is worth it.
If you have a busy schedule that can make a thorough cleaning difficult, why not hire a top rated cleaning company with the tools, experience, and expertise to efficiently clean your home, including the often-overlooked areas? At Three Little Birds, we provide comprehensive cleaning services that tackle these hard-to-get places, ensuring that your home is spotless and free of dust, dirt, and allergens. Thanks to our professional cleaners and top-quality cleaning products and equipment, you can enjoy a healthier and more hygienic living environment without having to lift a finger! To learn more about our services or schedule your next cleaning, call 905-538-5046.
Looking for a Residential Cleaning Quote
An exceptional residential cleaning experience, done right, by people who care.
Get an Instant Price